| Happy Belated Valentine’s Day! If you follow my blog for any period of time, you’ll learn that I LOVE to decorate. Some of my favorite decorations are my various holiday decorations; and no holiday is too small to decorate for! So when I noticed some wooden Q’s and X’s while browsing through the clearance section (I always make a pit stop in the clearance isle) of my local craft store, an idea popped into my head… Supplies: ~ 2 X’s ~ 2 O’s (or Q’s that have "had a little work done”) ~ paint – I used pink and robin’s egg blue ~ glitter – I used 3 shades of pink ~ Mod Podge ~ glue – I used E6000 (contact cement) ~ square canvas – 20” x 20” ~ ribbon – if you wish to hang your project First things first, I had to do a little trimming to turn my Q’s into O’s; so what did I do, I asked my hubby to do it. He has a far steadier hand with the Dremel than I do and he did a great job for me! Once the O’s were ready to go, I gave both X’s and both O’s two light coats of paint. I decided on pink paint, but feel free to choose any color you’d like. Be sure to give them plenty of time to dry before the next step. Next, the fun part… glitter! Who doesn’t love glitter?!? For this project, I decided to try something new and do an ombre glitter with three different shades of pink. Some of my favorite glitter colors are in the Recollections line at Michaels; for this project, I used Blush (light), Bubblegum (mid-range), and Raspberry (dark). Working one at a time, I covered each letter in a liberal coat of Mod Podge. Then, starting at the natural bottom of the letter, I sprinkled the dark pink (Raspberry) across the bottom. Working my way up the letter, I lightened up on the sprinkling and only covered approximately the bottom 1/3 of the letter. Next, starting at the natural top of the letter, I sprinkled the light pink (Blush) across the top. Again, working my way down the letter, I lightened up on the sprinkling and only covered approximately the top 1/3 of the letter. Lastly, I sprinkled the mid-range pink (Bubblegum) across the middle 1/3 of the letter making sure to blend the mid-range pink up and down into the other two shades. Once all the glitter has been sprinkled, don’t move the letter(s) or try to shake off any excess until the Mod Podge has fully dried. Thirty minutes to an hour should be long enough… my rule of thumb is: the longer, the better. Plus, I usually take this time to get things done around the house, like laundry, putting things away, organizing my craft room, etc. Crafty Tip: When it comes to glitter, the more contained you can keep it, the better. Try cutting open a brown, paper, grocery bag and glittering on it. Then, you can either wrap all the excess glitter inside it and get rid of it, or you can fold it in half and shake the excess glitter into a small container for another project. Once the Mod Podge is dry, carefully pick each letter up one at a time and turn it over; holding it several inches above your work space/ paper, tap the undecorated side (currently facing upward) to remove any excess loose glitter. Do this with each letter then set them aside with the decorated side up. Next, if you wish, you can seal on the glitter with “glitter seal,” an aerosol you can get at most craft stores. I didn’t have any on hand, so I decided not to worry about it. If you do, be sure to work in a well ventilated area and follow the directions with several light coats to avoid runs or messing up the glitter. This is where I tossed my original plan to arrange the letters in a square and attach them to each other went out the window. I just couldn’t find that perfect arrangement so, I improvised. While walking around the craft store the next day, I was browsing the clearance section, again, when I spotted a large 20 inch by 20 inch canvas in the “As Is” bin for only $4.24! Inspiration had struck again and I was thrilled to have a plan. With my hubby’s helpful eye, we decided Robin’s Egg Blue was the perfect color to compliment the X’s and O’s and as soon as we got home, I got busy painting. I gave the canvas 3 good coats to get the most vibrant color I could. Again, I allowed for ample drying time between coats… and yes, I really do let it all dry for a long while even though I’m anxious and overly excited to put it all together! Once my canvas was dry, I laid out my letters. Originally, I was going to have both rows of letters arranged with the light glitter at the top and the dark at the bottom. I was super excited to finally see it all coming together. Then, my hubby suggested turning the bottom row over so the dark ends were closest together. This change amplified my excitement about the end product! I LOVE it this way and am so glad that he thought to look at it for another angle. Once my letters were where I wanted them, I glued them down with my trusty E6000. I’m sure you can guess what I did next… yep, I let it dry one last time. This time, I let it set for a few hours just to be sure it was secure. At this point, you can either enjoy it the way it is by leaning it against a wall on display, or you can add a picture hanger or ribbon to it and hang it wherever you like. Either way, make it your own and have fun with it! So what do you think? Will you be adding this to your Valentine’s Day decorations? 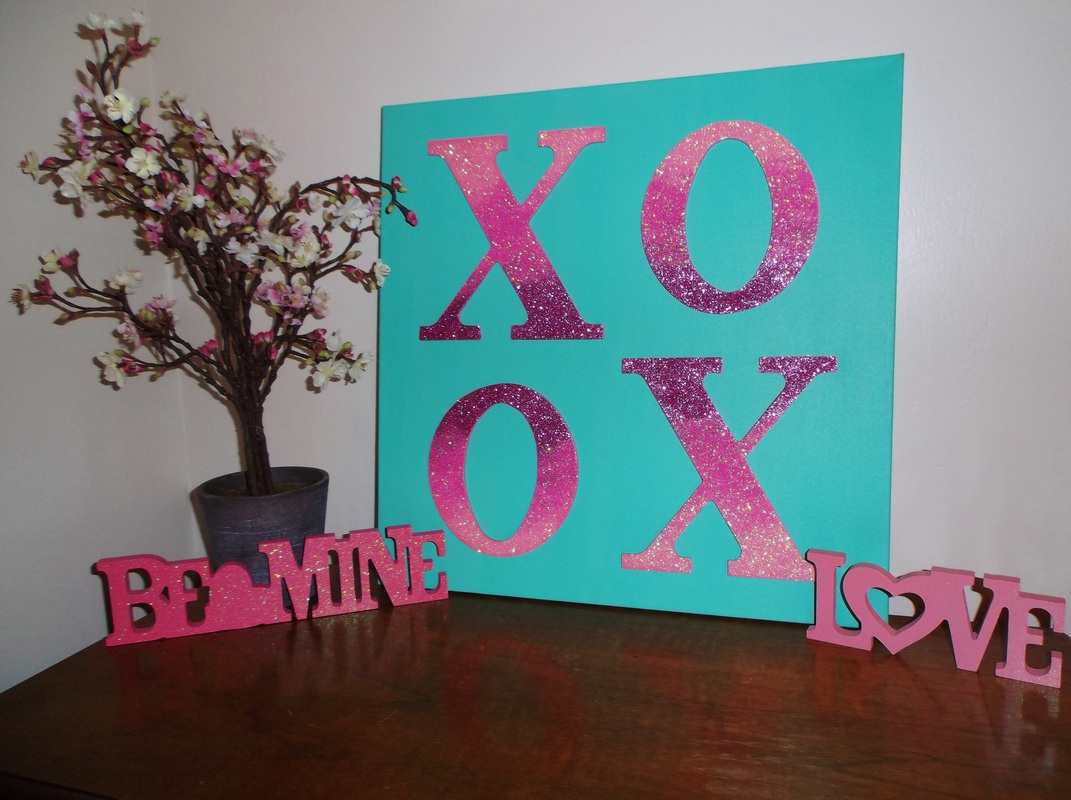  |   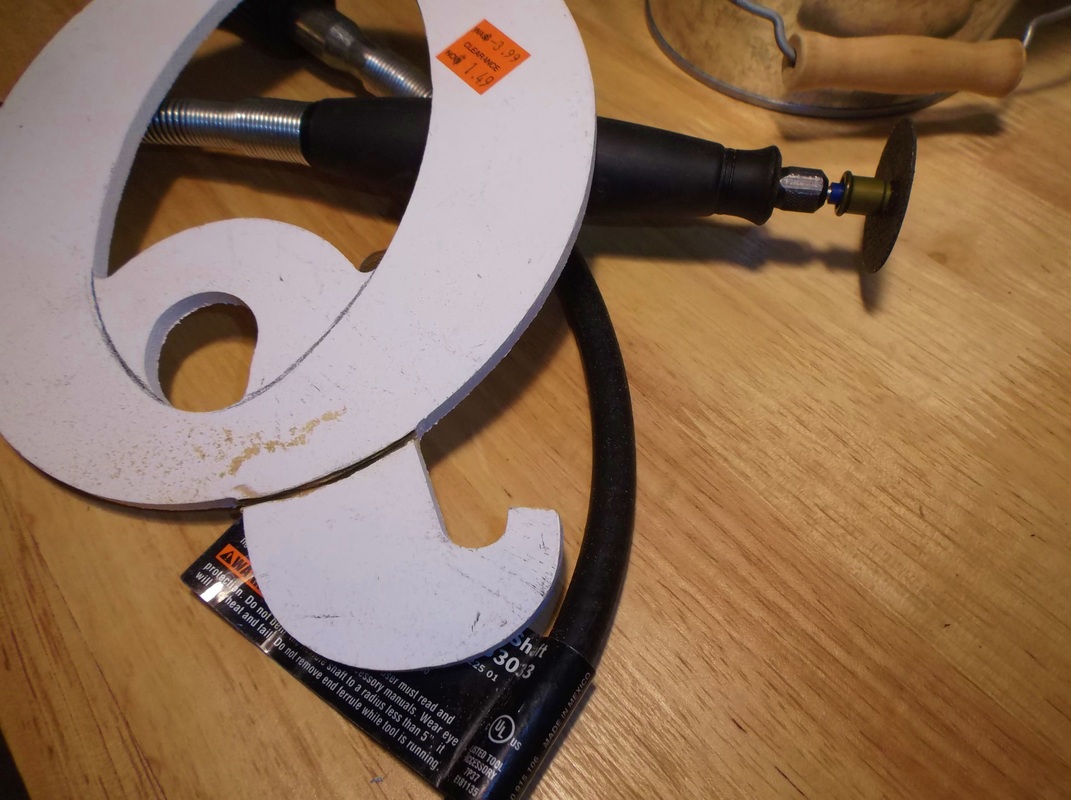 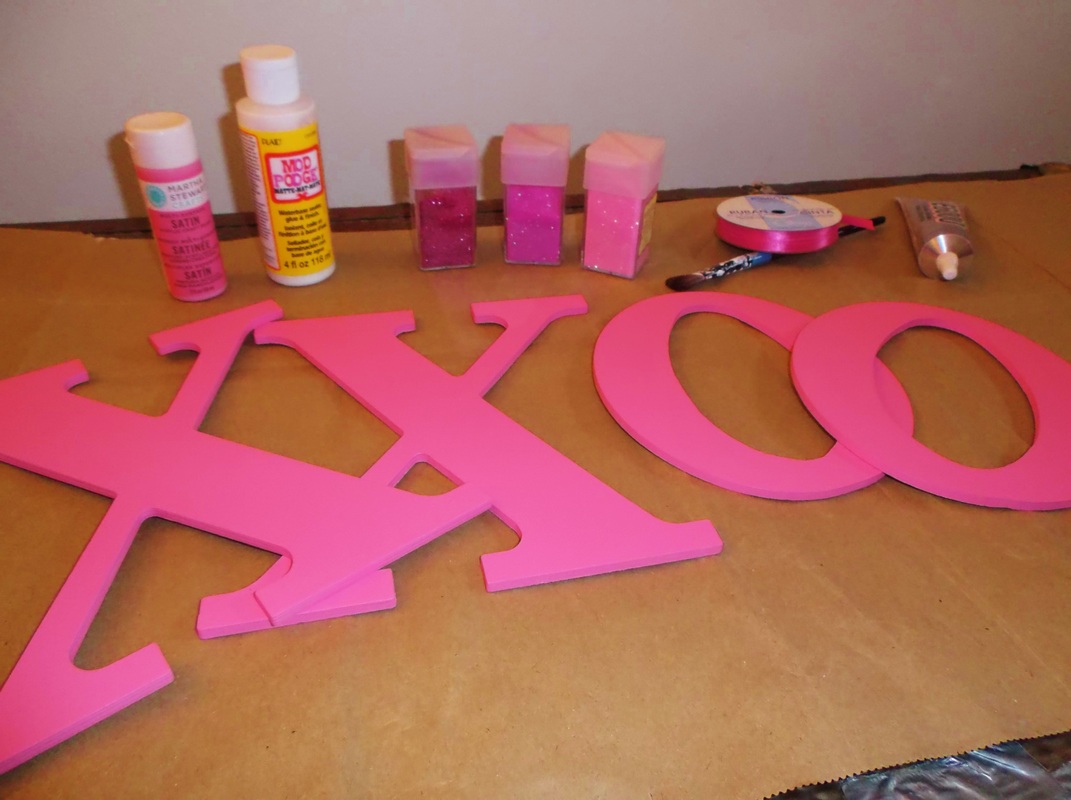 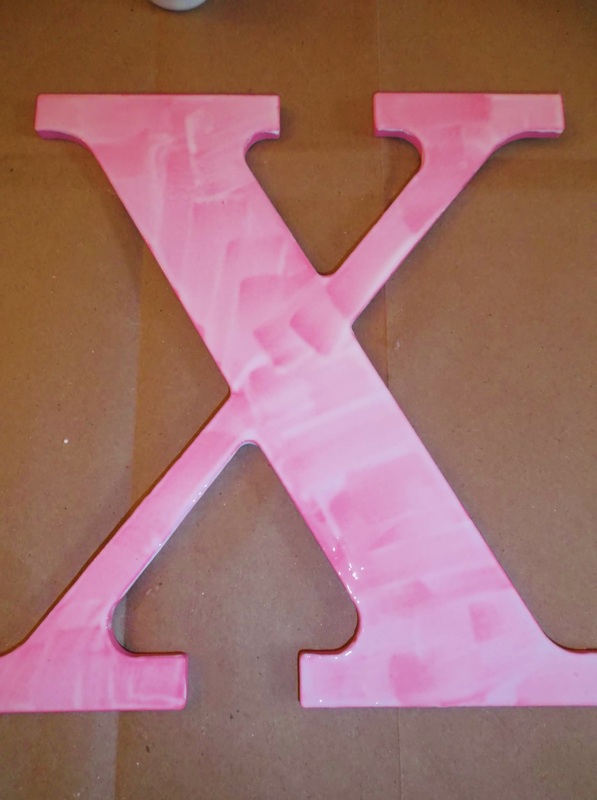 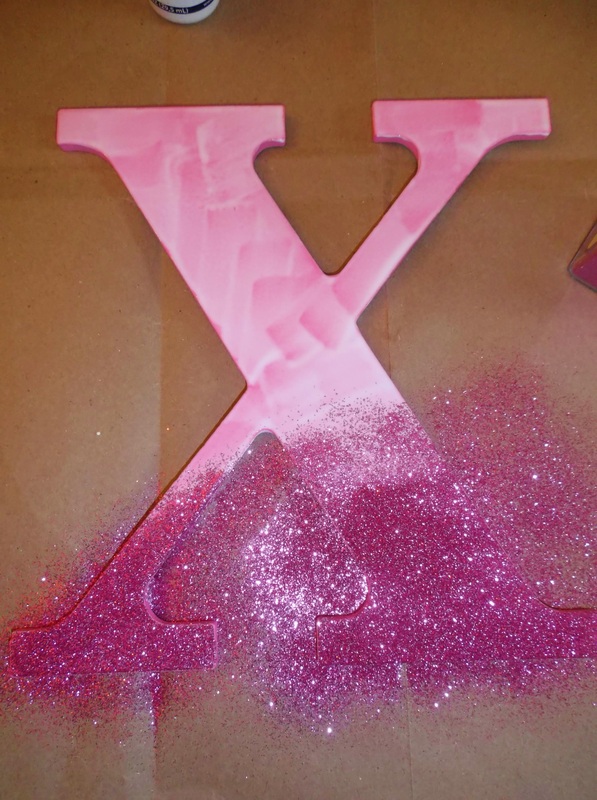 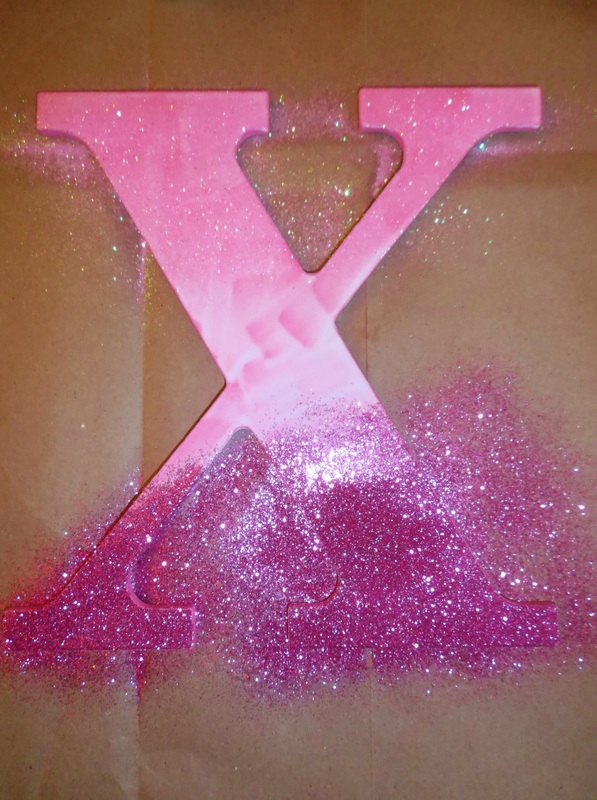 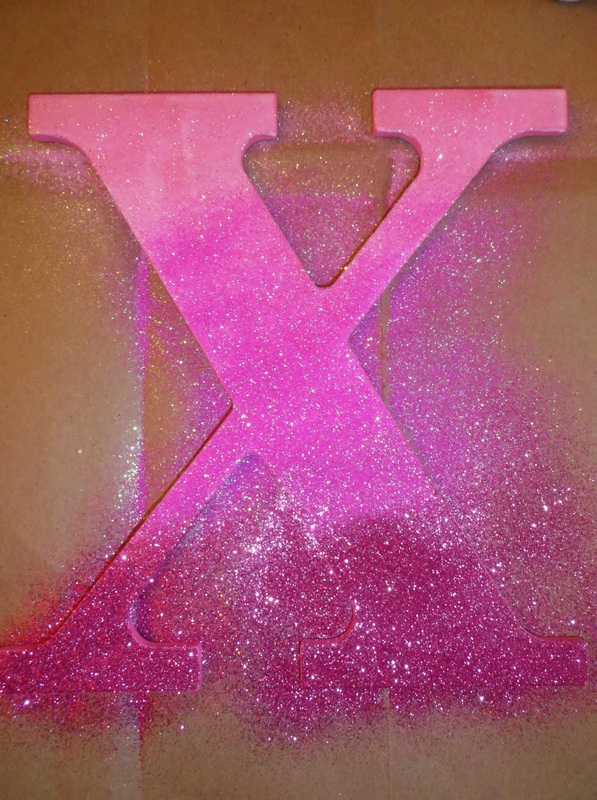 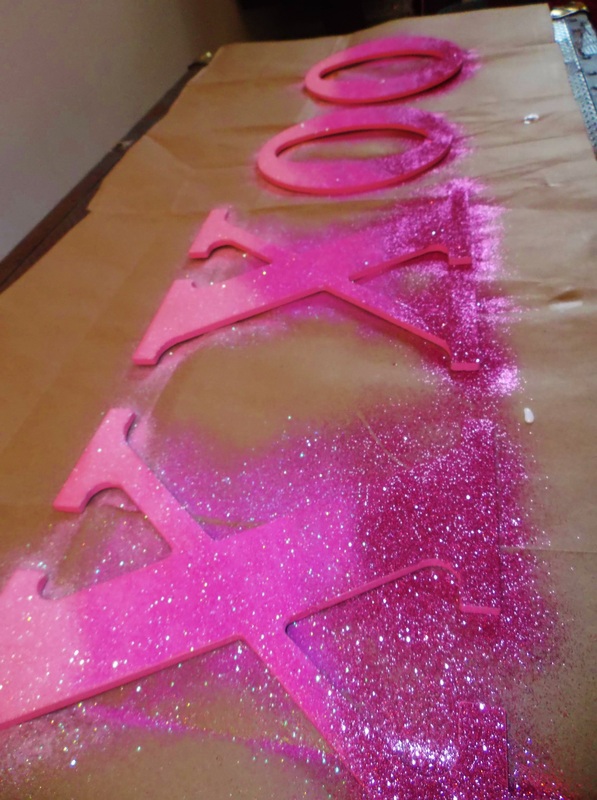 |
|
1 Comment
|
AuthorTo put it mildly, I LOVE crafting! The only problem is that I don't fancy just one specific type of craft, I love it all. With this in mind, I've decided to keep a running chronicle of projects and, hopefully, inspire someone else along the way. Categories
All
Archives
May 2016
Note:The information provided in this blog are my opinion and is not guaranteed. Results may vary. If you have any questions, please feel free to reach out to me via my "Contact" page. I am not affiliated with any of the companies or products I may write about.
|
 RSS Feed
