

I never said the glue had to be pretty!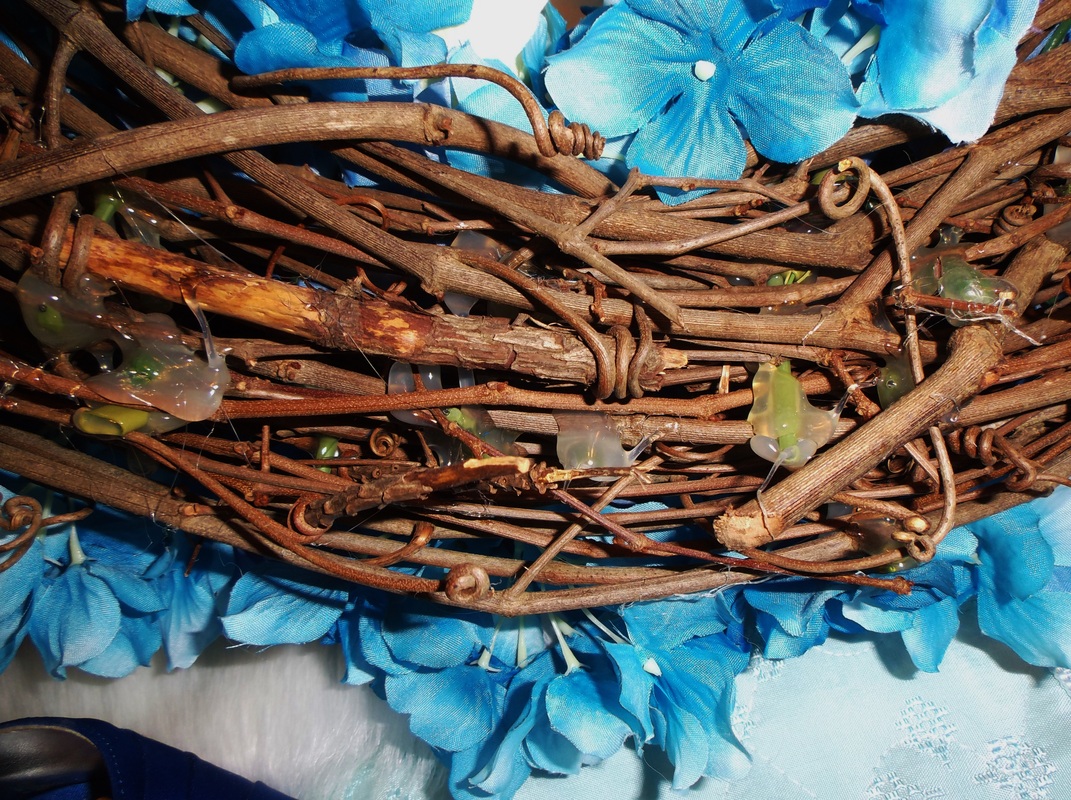
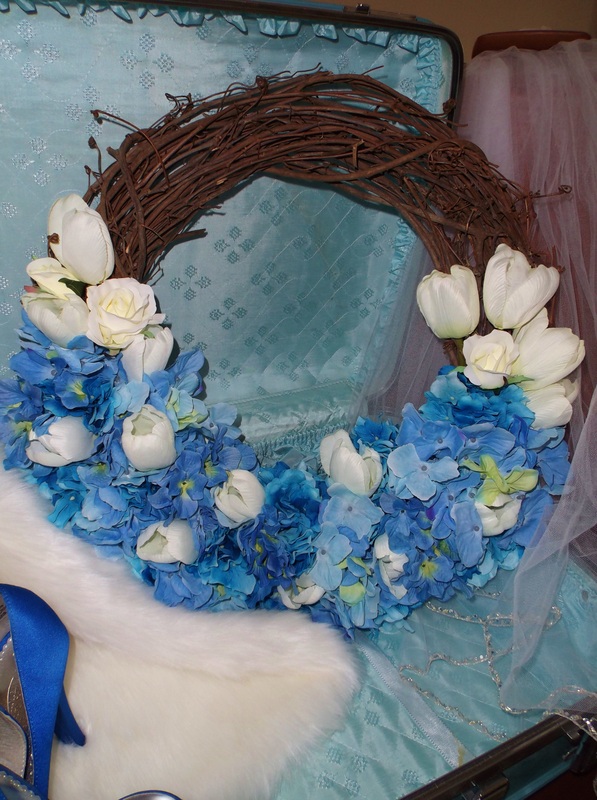
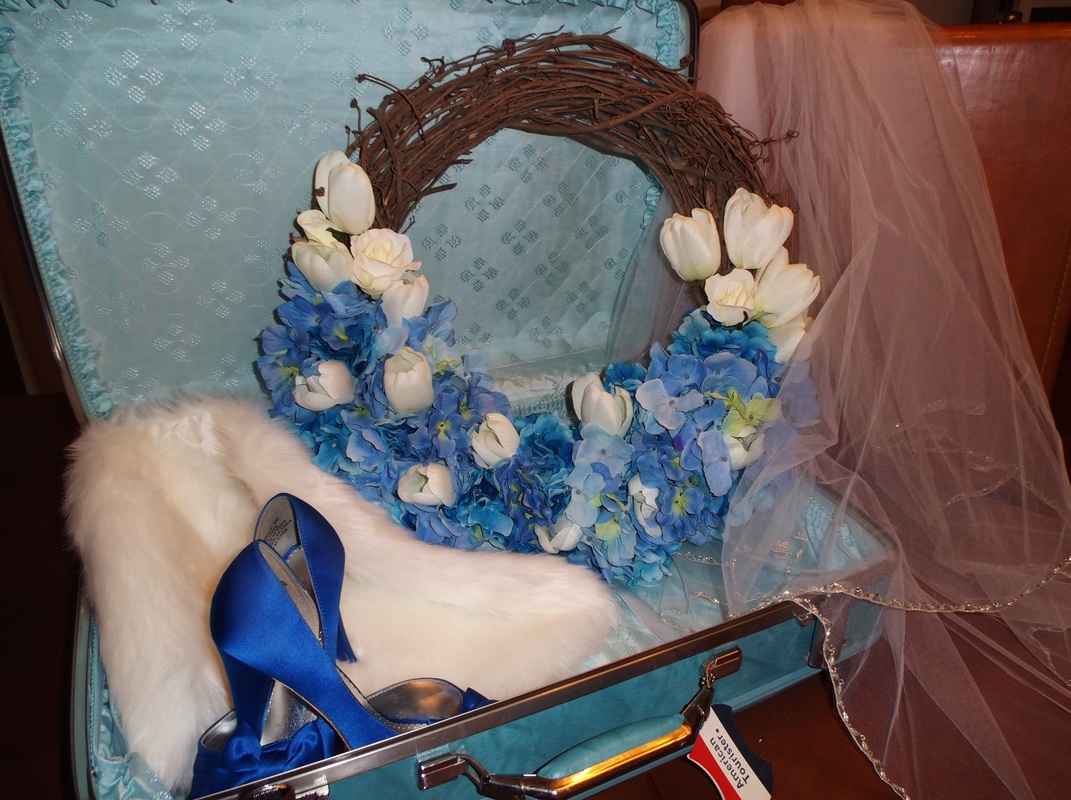
| Happy Anniversary!Three years ago I married my best friend and the man of my dreams. Today’s project post is about a wreath I made to be able to enjoy the flowers from our wedding and my bouquet year round. The inspiration for this project came from a friend who had beautiful wreaths covered in white hydrangeas around her house that were used for her wedding. Supplies: ~ grapevine wreath – the brown, twiggy-looking ones ~ artificial flowers – I used blue hydrangeas, white tulips, and white roses. ~ wire cutters ~ hot glue gun & glue sticks Artificial flowers can be a little on the pricey side, so I restrained myself (barely) and waited until the end of spring when the spring seasonal flowers were on sale big-time; as in “clear-it-out,” clearance prices. It was well worth the wait too, because I was able to come home with $75 worth of flowers for $10. At most craft stores, the possible floral combinations are endless. Have fun when choosing your flowers; go for flowers that grab your attention, this is your wreath after all! Once I had your flowers home, I used my wire cutters to trim the stems and to separate any that came in bouquets/ bunches. For projects like this, I leave my stems as long as I can because I can always trim them more later, but I cannot add it back after the fact. For flowers that come as a single stem, I usually trim them to about 6 inches long from the base of the flower. Once they are separated and trimmed the fun part begins… deciding how you want to lay them out. For my wreath, I knew I wanted approximately half of the wreath covered with the flowers reaching higher on one side than the other. With this in mind, I started in the center of the bottom of my wreath and worked out from there. I started by placing one large blue hydrangea at that bottom, center point. To place the flower, gently push the stem through the grapevine wreath until the flower is resting on the wreath itself. At this point, it’s ok if the stem sticks out of the backside of the wreath, they will be trimmed later. After my first flower was on, I went to town with the rest of them. I spent a good amount of time arranging and rearranging my wreath until it was perfect, then I just had to make sure it stayed this way… cue the hot glue gun! Crafty Tip: Try slightly propping the top of the wreath up while you are working, it provides a much better vantage point for you to decide how your flowers should be arranged. When it comes to gluing your flowers in place, there are numerous was to do it. In my mind, there are two main “methods” for doing this. The first is to carefully remove each stem, one at a time, slather it up with glue and hope you got it back in the right spot. The second is to carefully flip your wreath over and glue it all from the backside; which is what I did. Now, you may be asking yourself, what about trimming the stems? I don’t want them to keep sticking out the back! This step also has a few ways it can be done, all of which include a pair of wire cutters. You can either trim-then-glue, or you can glue-then-trim. Personally, I trimmed my stems right before I glued them. So I would trim one, then squeeze hot glue all in and around the stem making sure that it was all over the wreath also. This way I knew the flower wasn’t going anywhere. Then I repeated this process for each of the other stems. My reason for doing them one at a time like this was to make sure I didn’t miss any, but you do whatever works best for you. Once I had all of my flowers glued in place and my stems trimmed, I turned my wreath right side up and gave one more thorough look-over. I went back and fixed anything I wasn’t thrilled with and added a few more tulips and roses where I thought they were needed. After that, there was only one thing left to do… hang it where I could enjoy it every day! Now that you’ve had some time to think, what flowers are you going to use on your wreath? |
|
0 Comments
|
AuthorTo put it mildly, I LOVE crafting! The only problem is that I don't fancy just one specific type of craft, I love it all. With this in mind, I've decided to keep a running chronicle of projects and, hopefully, inspire someone else along the way. Categories
All
Archives
May 2016
Note:The information provided in this blog are my opinion and is not guaranteed. Results may vary. If you have any questions, please feel free to reach out to me via my "Contact" page. I am not affiliated with any of the companies or products I may write about.
|


 RSS Feed
